We’ve moved!

It’s been a long time coming, but I’ve finally moved to a new website focused primarily on food and family.  Similar to what I’ve been doing here, I plan to share recipes that are tried and true and well-loved by our family!

Please check out the new site, Little Bear’s Kitchen!

http://littlebearskitchen.com/

It is still a work in progress, and I am slowly merging it with my old website “Frugal Adventures” (hence the pictures with the FA watermark, posts referring to saving money, etc).  Clean up is slowly coming along, so please pardon the dust!  Thanks!


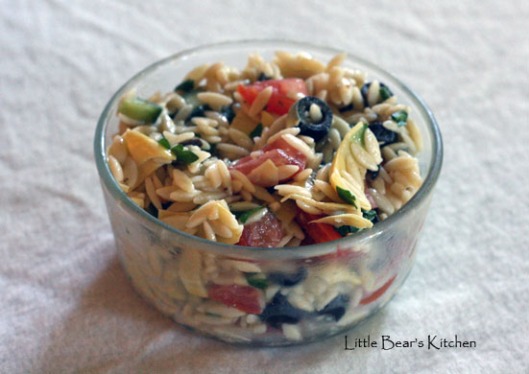
Greek Orzo Salad

Tags

, , , , , , , , , , ,

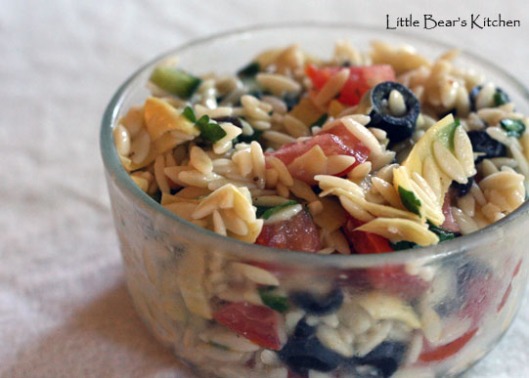
Greek orzo salad is a wonderfully light and fresh summer dish that works well as a side dish or as a meal.  You can pair this with chicken shawarma, grilled chicken or beef kabobs, or even a simple turkey sandwich.  Because this salad is chilled, its perfect for those hot days when you need something cool and refreshing.

You can use regular cucumber if your grocery store doesn’t carry English cucumber.  However, I always make it a point to use English cucumber for this dish because: 1) the skin isn’t waxy, which saves time on peeling, 2) the seeds are small and not watery, which allows you to just chop away without worrying about deseeding.  If you opt for regular cucumbers instead, you’ll want to use two, and be sure to peel and deseed them.  The English cucumbers are much larger, so one is sufficient for this salad.

Side note: The tomatoes in this dish will start to “leak” water over time and get mushy, which prevents this dish from lasting more than several days.  But trust me, it probably won’t last that long…that’s how good it is!

Greek Orzo Salad

1 box uncooked orzo pasta
1 14 oz can artichoke hearts, chopped
4 tomatoes, seeded and chopped
1 English cucumber, chopped
1  4 oz can sliced black olives, drained
1/4 c. chopped fresh parsley
 

Dressing:

6 T. olive oil
5 T. red wine vinegar
Juice of 1/2 lemon
2 t. dried oregano
Ground black pepper to taste
 

Bring a large pot of lightly salted water to a boil.  When water is boiling, add the orzo pasta and cook about 8-10 minutes or until pasta is al dente.  Drain.

While the pasta is cooking, combine the chopped artichoke hearts, tomatoes, cucumber, olives and parsley in a large bowl.  Mix well.

In a small bowl, whisk together the olive oil, red wine vinegar, lemon juice, black pepper, and oregano. Set aside.

When the pasta is cooked and drained, add to the artichoke heart mixture.  Pour the dressing over the pasta and vegetables, toss well.  Cover the bowl and let chill in the refrigerator for at least 1 hour to allow the flavors to meld.  Enjoy!

Makes 10-12 servings.

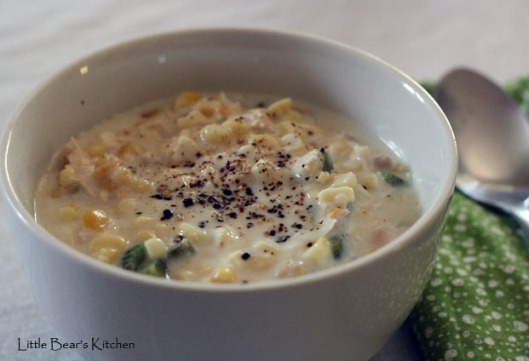
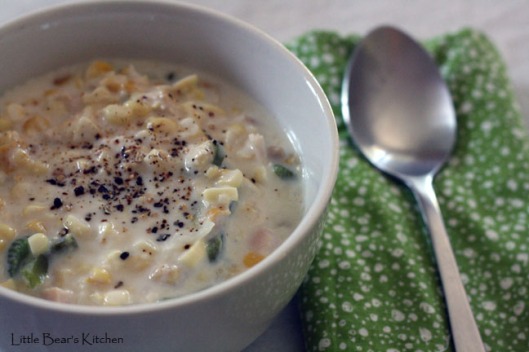
Chicken Corn Chowder

Tags

, , ,

Corn was on sale at the grocery store this week (4 for $1) and I couldn’t resist.  I bought four ears of corn before I knew what I would make with it.  I had just made some sweet corn salad and wanted to do something different this time.  I found a recipe for quick chicken corn chowder in my Cooking Light cookbook and decided to give it a try.

I did this the hard/long way and bought a roasted chicken from Costco and hand-shredded the meat.  I used fresh corn and it took about fifteen minutes to shuck the corn, wash it, pick off the fine silken corn hairs, and then cut the kernels off the cob.  So this soup wasn’t very quick to make, but if you use frozen corn and have some chopped cooked chicken handy, it would probably take ten minutes or less to throw this soup together.  I didn’t have any thyme handy, so didn’t add it, but if you got it, toss it in to give the soup some extra flavor.  🙂

The verdict…I love this soup!  Its very light and refreshing.  Each bite of corn is a burst of sweetness, and the chicken helps make this soup heartier and more filling.  I will definitely be making this soup again this summer.

Quick Chicken Corn Chowder, adapted from The Best of Cooking Light

2 T butter
¼ c. chopped onion
¼ c. chopped celery
2 T. all-purpose flour
4 c. 2% reduced-fat milk
2 c. chopped roasted skinless, boneless chicken breasts (about 2 breast halves)
1 15 oz can cream-style corn
2 c. fresh or frozen corn kernels (about 4 ears of corn)
Ground black pepper and salt to taste
 
Melt butter in a large Dutch oven over medium heat.  Add onion and celery and cook 3 minutes or until tender, stirring frequently.  Add flour, cook 1 minute, stirring constantly so flour doesn’t burn.  Pour in the milk and add the remaining ingredients.  Bring to a boil and cook until thick, stirring frequently. 
 
Makes 8 servings, of about 1 cup each
 

Chicken Tikka Masala Burritos

Tags

, , , ,

Chicken tikka masala is one of my tried-and-true dishes that I’ll make when I’m either craving Indian food or trying to use up the rest of the heavy whipping cream and plain yogurt in the fridge.  In this case, it was the latter.  I bought some Pavel’s yogurt a couple of weeks ago after reading rave reviews about it.  I thought I’d like it, but hated it.  The yogurt was way too tart and the consistency too thin, almost bordering on soupy.  I had spooned out a small portion, tried mixing in some pureed fruit and even some sugar, but it was a lost cause.  I ended up using up the rest of the tub of Pavel’s yogurt in some zucchini bread (recipe coming at some point) and this chicken tikka masala.

I usually eat chicken tikka masala over white rice, but this time around, I decided to make some chicken tikka masala burritos.  I got the idea from Curry Up Now, which is a restaurant in San Mateo, and they have at least three food trucks roaming the Bay Area.  Their chicken tikka masala burritos are so good.  Both Hubby and I were fans after one bite, but I also felt I could easily replicate it at home.  Curry Up Now charges $8 or $9 for a burrito (plus tax and tip), but it only costs me about that much to make a large pot of chicken tikka masala.

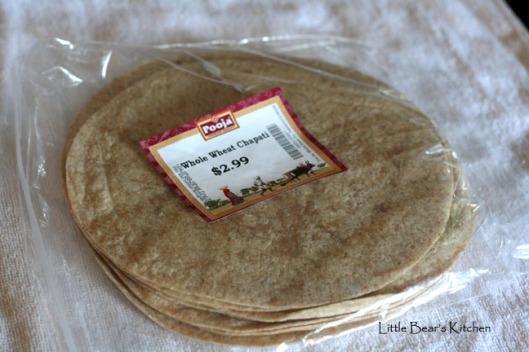
So I went to our local Indian market and bought some chapati.

The chapati used at Curry Up Now must be bigger because we were only able to make regular-sized burritos with these, and Curry Up Now’s burritos were quite large (enough to feed 2 people).  Unfortunately, the Indian grocery store only had this one size, so that’s what I had to work with.

I had taken some pictures, but sadly, they didn’t turn out very well because it was dark by the time Hubby and I sat down for dinner.  But these burritos are pretty simple to make:

1. Portion out a small bowl of rice and add chicken tikka masala (we used a 1:1 ratio).  Mix well.

2. Place chicken tikka masala filling onto chapati (no need to heat up chapati ahead of time).

3. Fold in the sides over the filling, then roll up the chapati, burrito style.

4. Enjoy!

Will definitely be making these again!

Chili galore

Tags

,

A few weeks ago, I responded to an evite for a freezer meal swap.  Never heard of this concept before, maybe because I’m Asian and we didn’t do casseroles or freezer meals growing up.  But it seemed interesting and even possibly fun, so I responded “yes.”  Lo and behold, seven other ladies responded “yes,” so I spent a day last week gathering ingredients, prepping ingredients, and finally cooking enough food to feed eight families.

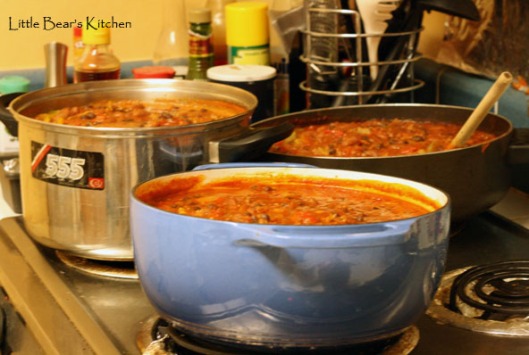
What recipe can be doubled, tripled, or even multiplied eight times, is easy to make, and freezes well?  Chili and pasta sauce was all I could think of.  So I made three humongous pots of chili, roughly following my favorite Flatlander Chili recipe, but soon gave up after it was clear I couldn’t follow a recipe while using three different sized pots and an unmeasured amount of beans and ground beef.  Chili isn’t that hard to make so I decided to just wing it instead.

After spending the day buying ingredients, prepping ingredients and cooking, I have to say, it was not fun.  It was a chore.  I think in the future, I will make my meals fresh and the day of.  No more of this freezer meal stuff.  Cooking things fresh isn’t that hard and doesn’t take that much time.

In hindsight, I should have taken a picture of all the ingredients so you could see the mess that took over the kitchen counters, but I didn’t think of it at the time.  I just wanted to get it done and over with.  But I did use about 7 pounds of ground beef, 3 pounds of kidney beans, 2 pounds of black beans, 3 onions, 1 bunch of celery, 3 green bell peppers, 3 red bell peppers, 5 or 6 28oz cans of crushed tomatoes, 6  15oz cans of diced tomatoes, 3 28oz cans of tomato sauce, and various herbs and spices.
I would say that making a huge batch of food to be frozen is great for situations like when you’re pregnant and not planning on doing a lot of kitchen time once the baby is first born.  I did spend a week last April making all sorts of frozen meals, frozen burritos, cookies, muffins, etc, and it was time very well spent.  Of course, I was on maternity leave, not working and had nothing better to do.

But now?  Eh.  Would probably not do this again.  I can’t look at chili anymore.  Hubby says its the most of one type of food he’s ever seen me cook.  These pictures don’t do it justice.  These are mega-sized containers this chili is occupying.  I had to divide it into ziploc bags and freeze them flat.
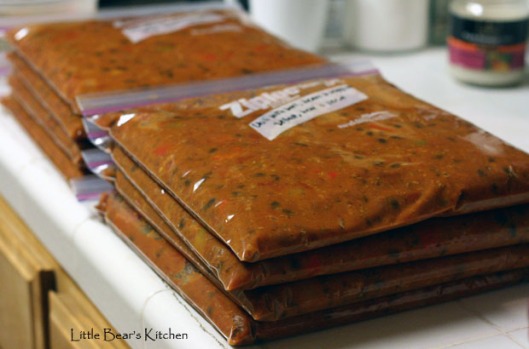
But first the freezer needs had to be cleaned and organized to make room for these babies.  I also went back out to the store to buy boxes of spaghetti noodles because the instructions were if you were bringing a sauce or stew, provide the rice or pasta.  Its kind of ironic because I think the idea behind this swap was to save time, but it was way more expensive and time-consuming than I thought it would be. I think I spent about $100 or more on this thing (beef is expensive!), which is much more than I normally spend on a week’s worth of groceries, maybe even two weeks.

If I ever do something like this again, I’d probably do something easier and faster, like pasta sauce with veggies.  Over half of the meals received were pasta with spaghetti sauce (albeit in different forms, ie casseroles, etc), which is super easy, fast and cheap to make.

Shrimp fried rice

Tags

, , , , ,

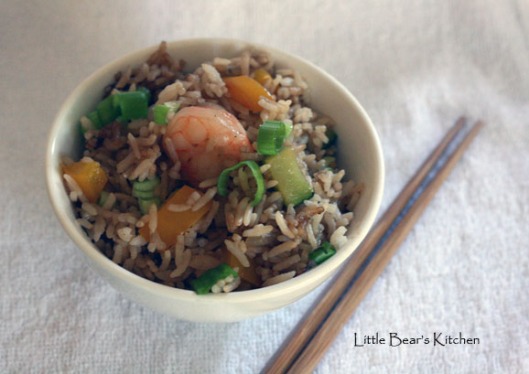
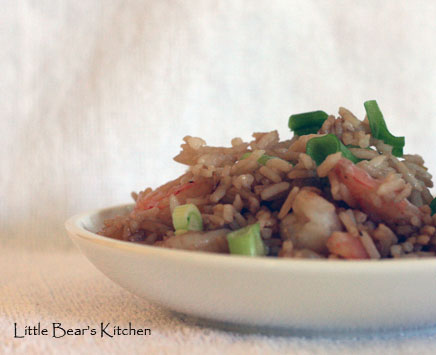
Continuing on with this week’s mission to use up as many ingredients in the fridge before they go bad….I made some shrimp fried rice for our lunch today.  Super simple, super easy.

The beauty of fried rice is that you can add almost anything to it and it can come out good.  Kind of like soup, where you can throw in whatever random veggies you have, along with the leftover chicken and rice, and voila, dinner.

On a side note, brining the shrimp will help give it that “bite” and “bounce” and improve the shrimp texturally.  Soaking the shrimp in a cool saltwater brine is  especially helpful if you happen to have a mushy batch of shrimp…brining will help salvage them.  If the shrimp is fine, then you can skip this step.  The shrimp I used were not mushy, but I wanted to give brining a try.  The verdict: the shrimp did have more flavor and bite to them, but I don’t feel that I’d be missing out if I didn’t brine the shrimp.

Shrimp fried rice

4 cups cooked long-grain white rice
1 pound shrimp, shells removed and deveined
1 zucchini, diced into small cubes
1 yellow bell pepper, chopped into small pieces
2 stalks green onions, diced
1/2 large onion, diced
pepper to taste
soy sauce
vegetable oil
 

While you are chopping and prepping the vegetables, soak the shrimp in a saltwater brine for about 20 minutes.  Rinse in cool water and pat dry.

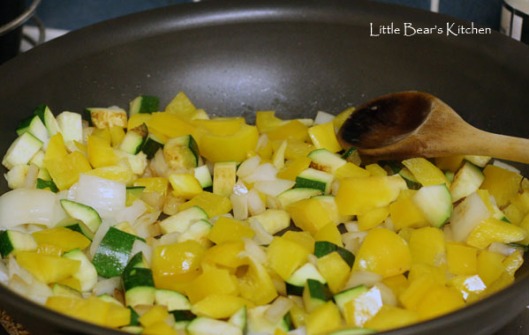
Heat oil in non-stick frying pan or wok.  Add onion and cook until it begins to become caramelized and transparent.  Add the zucchini and bell pepper, and cook for several minutes until they are tender.  Remove from pan, set aside.

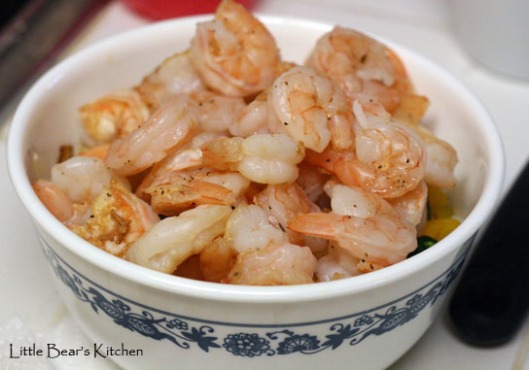
Add about 2 T of oil to the pan.  When the oil is hot, add the shrimp in a single layer.  If desired, sprinkle ground pepper lightly over shrimp to add flavor.  Do not disturb, do not move the shrimp.  Let cook until shrimp is pink (do not overcook). Remove the pan and side aside.

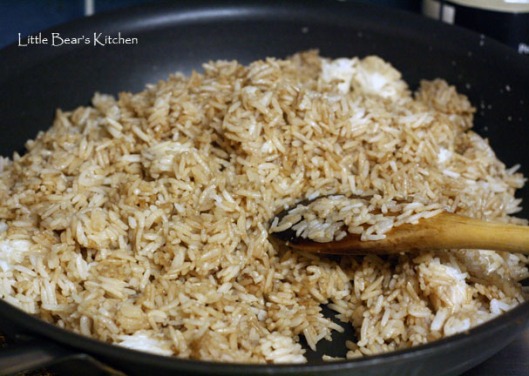
To the same pan, add about 2 T oil and when the oil is hot, add the rice.  Stir fry, adding soy sauce as needed to flavor and color the rice.

Add the shrimp, onions, zucchini and bell peppers, mix well.  Stir in the green onions.  Flavor with pepper to taste.  Enjoy!

One of the most refreshing salads ever

Tags

, , , , , , ,

The weather is getting hotter, which means, we need something nice, cool and refreshing to eat for dinner.  When its 80 degrees inside, I certainly don’t want to be slaving over a hot stove or using the oven to bake potatoes.  Oh no.  Enter corn salad.

I’ve actually made this before and instead of digging through my binder of recipes, this time I actually used the search feature on my site to find the recipe, haha.  How handy is that?

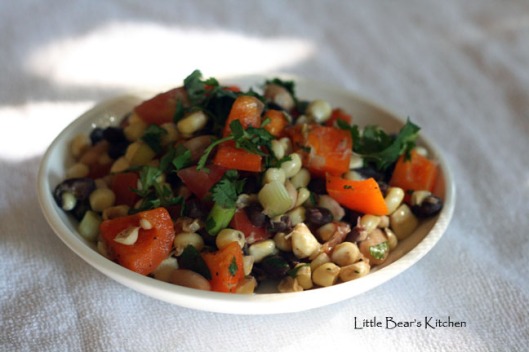
I did change the recipe a little bit to use what I had on hand.  I’ve been trying to use up what we have in the fridge and have been basing my menu planning off of what we already have.  This batch of corn salad used:

  • six ears of fresh corn
  • about two cups of black beans
  • a can of white kidney beans
  • two orange bell peppers, diced
  • three Roma tomatoes, diced
  • four stalks of green onion, diced
  • half a bunch of cilantro, chopped into little pieces

For uniformity, I tried to chop the bell peppers, tomatoes and green onions about the same size as the beans and corn.  Check out this post for the actual recipe.  This salad is best served chilled, so prepare to make it a couple of hours in advance and let it cool before placing in the refrigerator.  Letting the salad sit for a little bit in the fridge also allows the flavors to meld.

Hubby and I love this salad.  It is healthy, low fat, low calorie, and flavorful.  The beans help make this salad quite hearty, so it can work well as a main dish or as a side. Its perfect now that corn season is beginning and corn is starting to go on sale again.

To her credit, Baby Girl gave this salad a try and tasted a piece of corn, a black bean and a kidney bean.  Spit them all out.  Maybe its the vinegar dressing that she didn’t like, or the texture.  Who knows.  She’s entered a picky phase where she’ll only eat yogurt, oatmeal, puffs and cookies.  So frustrating!

Avery’s Bucket List

I’ve been spending the last few days on and off reading Avery’s Bucket List.  Most likely, you’ve already heard about it.  Ever since it was featured on Yahoo’s most popular news stories a few days ago, I believe the number of page views to the site has sky-rocketed, and with good reason.  Avery’s story is one of the most inspiring and heartbreaking stories ever.  I give huge props to her parents for choosing to be so positive and make a conscious effort to make the most of each moment they had with Avery.  They chose to life their lives and her life to the fullest, and use her life to raise awareness of SMA (spinal muscular atrophy).  Funny but I work in healthcare and had never heard of SMA before…maybe because its a pediatric condition and those with SMA don’t live very long….  Avery’s parents could have easily said, “why me?” and spent their days at home or at the hospital feeling sorry for themselves, but they didn’t.  I so admire that, and reading their blog makes me want to be a better mom and make the most of every day I have with Baby Girl.  Please check out their blog and learn more about SMA and how you can help!

Moroccan Beef Stew

Tags

, , , , , , , , ,

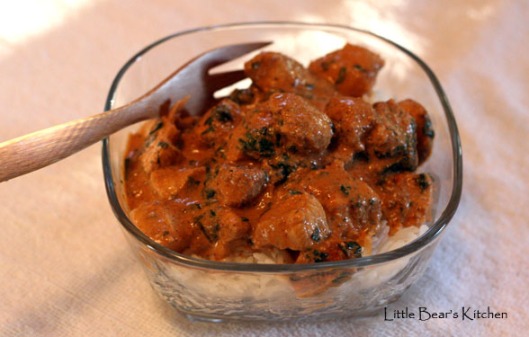
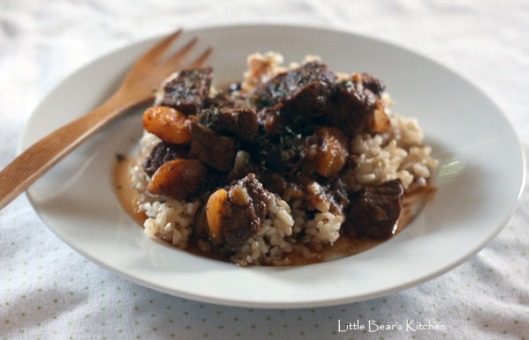
Due to popular demand (aka hubby’s request), I made Moroccan beef stew and brown rice tonight for dinner.  I found the recipe here on Budget Bytes and have made this beef stew at least half a dozen times in the last six or eight months.  Hubby loooves it.  I think because the beef is really tender and the dish isn’t very oily or fatty.  I love it because it comes together with minimal effort, but tastes like you’ve labored over the stove for hours.

Side note, the recipe calls for dried apricots, but don’t feel like you have to use those.  I generally use whatever I have on hand–mini bag of dried fruit (pears, apples, apricots), golden raisins, dried apricots, or dried cherries, and its come out tasting delicious each time.  I really don’t think the type of fruit matters, which is good because dried apricots can be expensive.  I just try to choose fruit that may go well in Moroccan type of dishes or just pair well with beef.

Baby Girl got to try some too.  I pureed some of the beef stew with a little extra water and served it over brown rice.  She ate it all up.  Not because she loved it, because I don’t think she did.  She’s not used to beef or non-sweet foods.  We had to use some trickery with some yogurt-switcheroo.  Still, she ate it all up and that’s what counts in this house.  No wasted food here.  Beef ain’t cheap, you know.

I’m alive!

Contrary to what it probably has seemed like, I’m not dead, I have not fallen off the face of the earth or gone into hiding.  No, life just simply caught up to me for lack of a better excuse.  Has it really been two years since my last post?  Or actually, over two years?  My apologies for slacking off!

These last two years have been all about change.  Honest-to-goodness life will never be the same again change.  But its a good kind of change.  I unexpectedly became pregnant in 2010, spent the next nine months getting our place ready for baby, gave birth in 2011 to a little rabbit baby (according to the Chinese zodiac calendar, that’s what she is), and now, Baby Girl is turning ONE next week!  The craziness of this new life has finally settled down into a predictable routine and I am able to start blogging again.  I had six glorious months off for maternity leave and was able to spend lots of time in the kitchen, cooking all sorts of delicious meals, trying out various recipes.  Although I’ve gone back to work full time, I’ve still been trying out new recipes and experimenting with different ingredients.  For a while, I was a baby food chef with all the purees I was making and experimenting with.  I have lots to share with you all, lots of catching up posts to write and pictures to share.

I’m still wanting to transition Little Bear’s Kitchen over to a new site so I have more control over the layout, background, etc.  But I still have no idea about html, css, coding, programming, moving a site from one to another, so this may take a while.  My new goal is to get it done sometime this year, haha.  For now, I’ve changed the looks to this beachy theme I randomly found on WordPress.  It has nothing to do with food, but it makes me think of the beaches in Hawaii and I really miss Hawaii.

Stay tuned!